
Transform Your Outdoor Space: Creative Landscaping with Big Boulders
Ready to give your yard a makeover? Using big boulders in your landscaping can really change the game. Whether you want a rugged, natural vibe or something more polished, these stones can turn an ordinary outdoor space into something special. Let’s explore some creative ways to use boulders that will inspire your next landscaping project.
Key Takeaways
- Feature boulders can create stunning focal points in your yard.
- Rock gardens blend plants and boulders for a natural look.
- Boulders can frame pathways and enhance curb appeal.
- Using boulders for seating around a fire pit adds comfort and style.
- Strategically placed boulders can help manage rainwater and prevent erosion.
Make a Bold Statement with Feature Boulders
Sometimes, all you need is one standout piece to create a stunning focal point. A single, large boulder can really anchor your front yard or garden, giving it a natural, sculptural feel. It's a simple way to add some serious character to your outdoor space.
Choosing Unique Shapes and Textures
When selecting a feature boulder, don't just grab the first rock you see. Take your time and look for something that speaks to you. Consider the shape – do you want something angular and dramatic, or smooth and rounded? What about the texture? A rough, weathered boulder can add a rustic touch, while a smooth, polished one can feel more modern. The color is also important. A boulder with interesting mineral deposits or variations can be a real showstopper. It's all about finding a piece that complements your existing landscape and reflects your personal style.
Surrounding with Plants and Mulch
Once you've got your feature boulder, it's time to think about the supporting cast. Surrounding the boulder with plants and mulch can really help it pop. Choose plants that complement the boulder's color and texture. For example, if you have a gray boulder, consider planting some vibrant green ferns or colorful flowers around it. Mulch can also help to define the space around the boulder and keep weeds at bay. Consider using a natural mulch, like wood chips or pine straw, to create a cohesive look.
Creating a Focal Point in Your Yard
The key to making a feature boulder work is to position it strategically. You want it to be the first thing people see when they enter your yard. Consider placing it near your front entrance, in the middle of your lawn, or at the end of a pathway. You can also use it to create a sense of depth and dimension in your yard. For example, placing a large boulder in the background can make your yard feel larger than it actually is. Just make sure the landscaping boulder rocks are stable and secure, especially if you have kids or pets running around.
Think of your feature boulder as a piece of art. It's a statement piece that should reflect your personality and style. Don't be afraid to experiment with different shapes, textures, and colors until you find something that you truly love. With a little creativity, you can transform your yard into a stunning outdoor oasis.
Design a Natural-Looking Rock Garden

Rock gardens are awesome because they blend greenery with boulders to create a super chill vibe. They're also pretty low-maintenance, which is a huge win. I've always been drawn to the idea of having one, but wasn't sure where to start. Here's what I've learned:
Blending Greenery with Boulders
The key is to choose plants that complement the rocks. Think about drought-resistant stuff like succulents, sedums, and ornamental grasses. These plants not only look great but also thrive in the well-drained soil that rock gardens need. I'm planning on using a mix of textures and colors to make it visually interesting. I saw a picture of a rock garden with creeping thyme spilling over the edges of the boulders, and it looked amazing. I'm definitely stealing that idea!
Incorporating Moss and Ground Cover
Moss is a game-changer for adding that natural, aged look to your rock garden. It softens the hard edges of the stones and creates a sense of tranquility. Plus, there are tons of different types of moss to choose from, each with its own unique texture and color. Ground covers like creeping phlox or sedum also work wonders. They fill in the gaps between the rocks and help to suppress weeds. I'm thinking of using a combination of moss and ground cover to create a layered effect.
Creating a Magical Forest Feel
To really nail that magical forest vibe, think about adding some small trees or shrubs. Dwarf conifers are a great option because they stay relatively small and add a touch of evergreen color. You could also incorporate some ferns or hostas for a lush, woodland feel. And don't forget about the little details, like adding some fairy lights or a small water feature. It's all about creating a space that feels whimsical and inviting.
I'm really excited about creating my own rock garden. I think it's going to be a great way to add some personality to my yard and create a relaxing space where I can unwind. I'm planning on starting small and gradually adding more features over time. I'll be sure to share some pictures once it's finished!
Transform Your Front Yard with Boulder Landscaping
Framing Walkways with Boulders
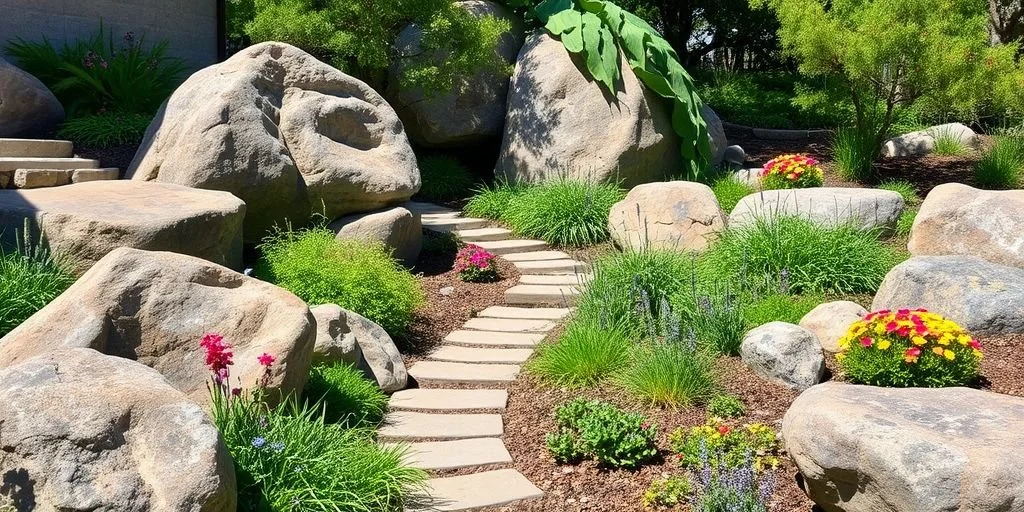
Tired of boring, straight walkways? Boulders can inject some serious personality! Instead of plain concrete, consider using large, flat rocks as stepping stones. Or, place boulders of varying sizes alongside your existing pathway to create a more natural, meandering feel. This instantly adds character and makes your front yard more inviting.
Layering in Raised Flower Beds
Raised flower beds are great, but they can sometimes look a little... cookie-cutter. Boulders to the rescue! Use them to create the walls of your raised beds. It's way more interesting than plain wood or brick. Plus, the rocks retain heat, which can be beneficial for certain plants. You can even mix and match different types of boulders for a truly unique look. It's a simple way to add texture and visual interest to your front yard boulder landscaping.
Adding Character with Rock Formations
Want to make a statement? Create a rock formation! This doesn't have to be anything crazy complicated. Even a simple cluster of boulders can add a ton of character to your front yard. Think about the overall style you're going for. Do you want something rugged and natural, or something more modern and sculptural? Choose boulders that fit your aesthetic. Here are some ideas to get you started:
- A small rock garden with drought-tolerant plants.
- A dry creek bed with smooth river rocks and a few larger boulders.
- A simple arrangement of three to five boulders of varying sizes.
Adding boulders to your front yard is a great way to increase curb appeal and create a welcoming space. It's also a relatively low-maintenance option, which is always a plus.
Don't be afraid to experiment and have fun with it! You can always rearrange the boulders until you get the look you want.
Build a Cozy Outdoor Fire Pit with Boulder Seating

Who doesn't love a good fire pit? And what's better than a fire pit surrounded by natural boulder seating? It's the perfect way to create a rustic, inviting space in your backyard. I've been wanting to do this for ages, and I think this summer is finally the time. It's all about creating a space where people want to hang out, tell stories, and just enjoy each other's company.
Arranging Boulders for Natural Seating
Okay, so the first step is figuring out how to arrange the boulders. You don't want it to look too uniform or planned, but you also don't want it to be uncomfortable. The key is to find boulders with relatively flat surfaces for sitting. I'm thinking of mixing different sizes and shapes to make it more interesting. Here's a few things to keep in mind:
- Consider the height of the boulders. You want them to be at a comfortable seating height, maybe around 16-18 inches.
- Leave enough space between the boulders for people to move around easily.
- Think about the view! Position the boulders so people can enjoy the fire and the surrounding landscape.
Creating a Warm Gathering Space
It's not just about the boulders; it's about the whole vibe. The fire pit itself needs to be the right size and in a safe location. I'm leaning towards a circular fire pit, maybe 3-4 feet in diameter. And of course, safety first! Make sure it's far enough away from any trees, fences, or structures. I'm also thinking about adding some gravel or sand around the fire pit to create a nice, even surface. You can even set boulders around your fireplace for a more dramatic effect.
A well-designed fire pit area should feel like a natural extension of your home. It should be a place where you can relax, unwind, and connect with nature and the people you care about. Think about the flow of the space and how people will move around it.
Enhancing with Lighting and Decor
Lighting can make or break the atmosphere. String lights are always a good option – they add a touch of whimsy and create a warm glow. Lanterns are another great choice, especially if you want something a little more rustic. And don't forget about the decor! A few well-placed cushions or blankets can make the boulders more comfortable and inviting. I'm also thinking about adding some plants around the perimeter to soften the edges and bring some life to the space. Maybe some potted flowers or some trailing vines. You can also line your garden borders with boulders to create a natural retaining wall. Here are some decor ideas:
- String lights (warm white or fairy lights)
- Outdoor cushions and blankets (weather-resistant)
- Potted plants (low-maintenance varieties)
Create a Functional Boulder Staircase
Got a sloped yard? Boulders can be your best friend! Forget boring concrete steps; let's talk about building a staircase that looks like it belongs in nature. It's not just about getting from point A to point B; it's about adding character and a touch of the wild to your outdoor space. Plus, it's a great way to deal with those tricky inclines.
Using Flat Rocks for Steps
The key here is finding the right rocks. Look for large, relatively flat boulders. You want something that provides a stable and even surface to walk on. Think of it like choosing tiles for your bathroom floor – you want something that won't wobble or cause you to trip. The size will depend on the slope and how long you want each step to be. Consider the rise (height) and run (depth) of each step for comfortable climbing. You might need to do some digging and leveling to get each rock sitting just right. Don't be afraid to experiment with different arrangements until you find what works best for your space. You can also use pre-cut concrete steps to make the process easier.
Integrating Plants for Softness
Okay, so you've got your boulder steps in place. Now, let's soften things up a bit. Planting around and between the rocks can make a huge difference in the overall look and feel. Think about adding low-growing ground covers like creeping thyme or sedum. These will spill over the edges of the rocks, creating a more natural and less harsh appearance. Ferns also work great in shadier spots. The goal is to blend the staircase into the surrounding landscape, making it feel like it's always been there. Plus, plants add a pop of color and texture, making the whole area more inviting.
Building Levels in Sloped Areas
Boulders are great for boulder retaining walls, but they can also help you create multiple levels in your yard. Instead of one long, continuous staircase, consider breaking it up into shorter flights with small, level areas in between. This not only looks more interesting but also provides opportunities for planting and creating little garden nooks. You can use smaller rocks and gravel to fill in gaps and create a more even surface on these level areas. This approach works especially well on steeper slopes, where a single long staircase might be too imposing. Think of each level as a mini-oasis, a place to pause and enjoy the view as you make your way up or down the slope.
Building a boulder staircase is a bit like solving a puzzle. It takes some trial and error to find the right rocks and get them positioned just right. But the end result is well worth the effort. You'll have a unique and functional feature that adds character and value to your outdoor space. Just remember to take your time, be patient, and don't be afraid to get your hands dirty!
Incorporate Boulders as Natural Dividers
Sometimes you just need to break up your yard a bit, right? Fences can feel so harsh, and hedges take forever to grow. That's where boulders come in! They're like nature's own room dividers. Plus, they add a cool, rugged vibe to your outdoor space. I've been playing around with this idea in my own backyard, and it's amazing how much of a difference a few well-placed rocks can make.
Breaking Up Yard Areas
Boulders are fantastic for defining different zones in your yard. Think about it: a cluster of big rocks can separate your chill-out patio from the kids' play area, or create a boundary between your flower garden and the lawn. It's all about creating distinct spaces without blocking everything off completely. I used some hefty granite boulders to mark the edge of my vegetable garden, and it looks so much better than the flimsy wire fence I had before. It feels more intentional, you know?
Creating Visual Interest
Let's be honest, a flat, boring yard is, well, boring. Boulders add instant visual interest. They come in all shapes, sizes, and colors, so you can mix and match to create a look that's totally you. I'm a big fan of using different types of stone to add texture and depth. For example, you could pair smooth river rocks with jagged, moss-covered boulders for a really cool contrast. Don't be afraid to experiment! You can use creative landscaping to make your yard stand out.
Maintaining a Cohesive Landscape
Now, here's the trick: even though you're using boulders to divide your yard, you still want everything to feel connected. The key is to repeat certain elements throughout your landscape. For example, if you're using a particular type of plant near your boulder dividers, sprinkle that same plant in other areas of your yard. This creates a sense of harmony and prevents your yard from looking too disjointed. Think of it like decorating a house – you want each room to have its own personality, but you also want a consistent style that ties everything together.
I think the best part about using boulders as dividers is that they're so low-maintenance. Once they're in place, you don't have to worry about mowing around them or trimming them like you would with a hedge. They just sit there, looking awesome, and doing their job. Plus, they're super durable, so you know they'll last for years to come.
Use Boulders to Direct Rainwater
Guiding Water Flow
Got some spots in your yard that always seem to be soggy? Boulders can be a surprisingly effective solution. By carefully positioning them, you can redirect rainwater away from areas prone to pooling and towards more suitable drainage points. Think of them as natural dams or channels, gently influencing where water goes. It's a simple fix that can make a big difference, especially if you're dealing with minor drainage issues.
Preventing Erosion
Erosion is a common problem, especially on sloped properties. Rainwater runoff can wash away topsoil, leaving your landscape looking bare and unhealthy. Boulders can help prevent this. They act as barriers, slowing down the flow of water and giving it a chance to soak into the ground. This reduces the amount of soil that's carried away, protecting your plants and preserving the integrity of your landscape. You can even use landscaping rocks like pea gravel around the boulders to further stabilize the soil.
Pairing with Native Plants
To really maximize the benefits of using boulders for rainwater management, consider pairing them with native plants. Native plants are adapted to your local climate and soil conditions, so they're better able to absorb excess water and prevent erosion. Plus, they provide habitat for local wildlife and add beauty to your landscape. It's a win-win situation!
Using boulders to manage rainwater is a smart and sustainable way to improve your landscape. It's a natural solution that can help prevent erosion, reduce water waste, and create a more beautiful and functional outdoor space. Plus, it's a relatively low-maintenance option that can save you time and money in the long run.
Enhance Your Landscape with Boulder Lighting
Lighting can really transform your yard at night, and boulders offer a great way to incorporate it. It's not just about security; it's about creating an atmosphere. Think about how you can use light to highlight the natural beauty of the stones and the surrounding plants. It's like giving your yard a whole new personality after the sun goes down.
Highlighting Features at Night
Strategic lighting can turn ordinary boulders into stunning nighttime features. Consider uplighting to emphasize the texture and shape of a large boulder, or use spotlights to create dramatic shadows. Path lighting can also be integrated with smaller boulders to guide people through your yard safely and beautifully. It's all about playing with light and shadow to bring out the best in your garden borders.
Creating Dramatic Effects
Want to add some real wow factor? Think about using colored lights or spotlights to create a dramatic effect. You could use blue lights to give your landscaping boulders a cool, ethereal glow, or use warm amber lights to create a cozy, inviting atmosphere. Experiment with different angles and intensities to see what works best for your space. It's like being a stage designer for your own backyard!
Using Landscape Lighting Strategically
Lighting isn't just about aesthetics; it's also about functionality. Think about how you can use lighting to improve safety and security around your property. Path lighting is a must for walkways and steps, and motion-sensor lights can deter intruders. But don't forget about the ambiance! Use softer, warmer lights in seating areas to create a relaxing and inviting space. It's all about finding the right balance between form and function. Consider these options:
- Path Lighting: Low-level lights along walkways for safety.
- Spotlighting: To highlight specific boulders or features.
- Uplighting: To emphasize the height and texture of large rocks.
Good landscape lighting is an investment. It not only makes your yard look great at night, but it also adds value to your property and makes it a more enjoyable place to spend time. Don't be afraid to experiment with different types of lighting to find what works best for you.
Wrap-Up: Your Boulder Adventure Awaits
So, there you have it! Boulders can really change the game when it comes to landscaping. Whether you want to create a stunning focal point, a cozy seating area, or just add some character to your yard, big rocks are the way to go. They’re versatile, durable, and can fit into just about any design style. Plus, using local stones can help your yard blend in with the natural surroundings. If you're feeling inspired, why not start planning your boulder project today? With a little creativity and some hard work, your outdoor space can become a true masterpiece. Happy landscaping!
Frequently Asked Questions
What are feature boulders?
Feature boulders are large, standout rocks placed in your yard to create a focal point. They can be unique in shape, color, or texture.
How do I create a rock garden with boulders?
To make a rock garden, combine boulders with plants and moss. Arrange them in a way that feels natural, like a forest.
Can boulders be used for seating?
Yes! You can arrange flat boulders around a fire pit or garden to create natural seating areas.
How can I use boulders to manage rainwater?
Placing boulders strategically can help direct rainwater flow and prevent erosion in your yard.
What plants go well with boulders?
Choose plants that complement the boulders, like colorful flowers or soft ground covers, to enhance the look of your landscape.
How can I light up boulders at night?
You can use landscape lighting to highlight boulders, creating beautiful effects and making your yard look stunning at night.